
How to Use the AMS 2026 Portal
A clear, step-by-step guide to everything inside the portal — written for attendees and exhibitors, screen by screen, exactly as it appears in the app.
Download the app, log in, complete your profile, get your badge, match with the right people, book meetings, chat, and run your booth — all in one place.
Everything, explained screen by screen
Every image in this guide is an actual screenshot taken from the AMS 2026 portal. Follow each part in order — or jump straight to the module you need using the navigation above.
How to Download the App
The AMS 2026 portal is a progressive web app — it installs straight from your browser to your home screen. No app store needed.
Android (Chrome)
Open the portal in the latest Google Chrome and tap the Get App button (or the install prompt that appears).
Tap Install in the pop-up. If you see a Google Play Protect “unsafe app” notice, tap OK to dismiss it, update Chrome and the Play Store first, then try again.
The AMS 2026 app icon appears on your home screen — open it anytime, full-screen.
Installed before and now see a warning on the app icon? Remove the icon, update Chrome, then add it again — the warning clears on reinstall.
iPhone (Safari)
Open the portal in Safari and tap the Share icon (the square with an arrow).
Scroll and tap Add to Home Screen.
Tap Add. The AMS 2026 icon appears on your home screen.
Getting Started
Install the app, log in, and find your way around the home screen.
Log In
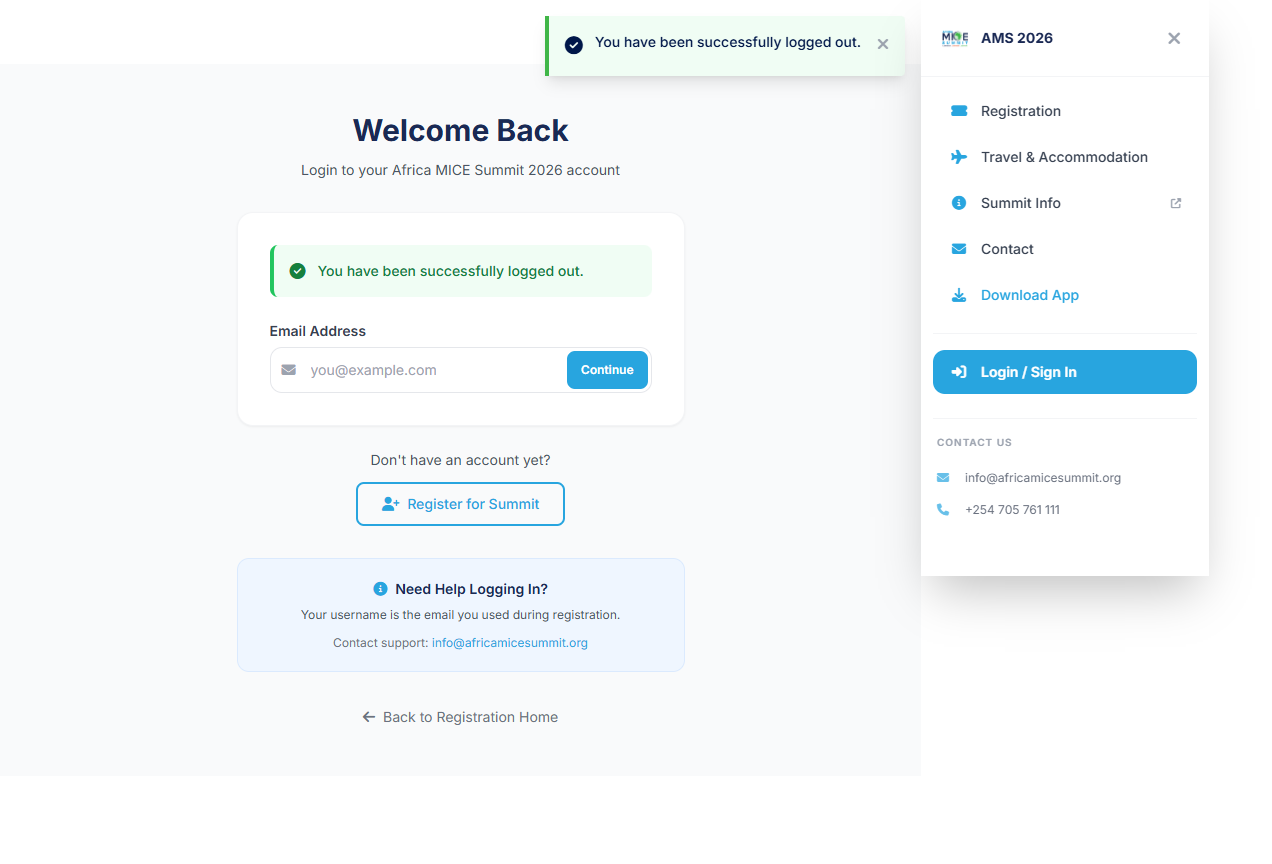
Logging in takes two quick steps: enter your email, then your password. The portal remembers your session on your own device.
How to
- Open the AMS 2026 app (see How to Download the App above).
- Enter the email you registered with, then tap Continue.
- Enter your password and tap Sign In.
- You land on your personal Dashboard.
Home Dashboard
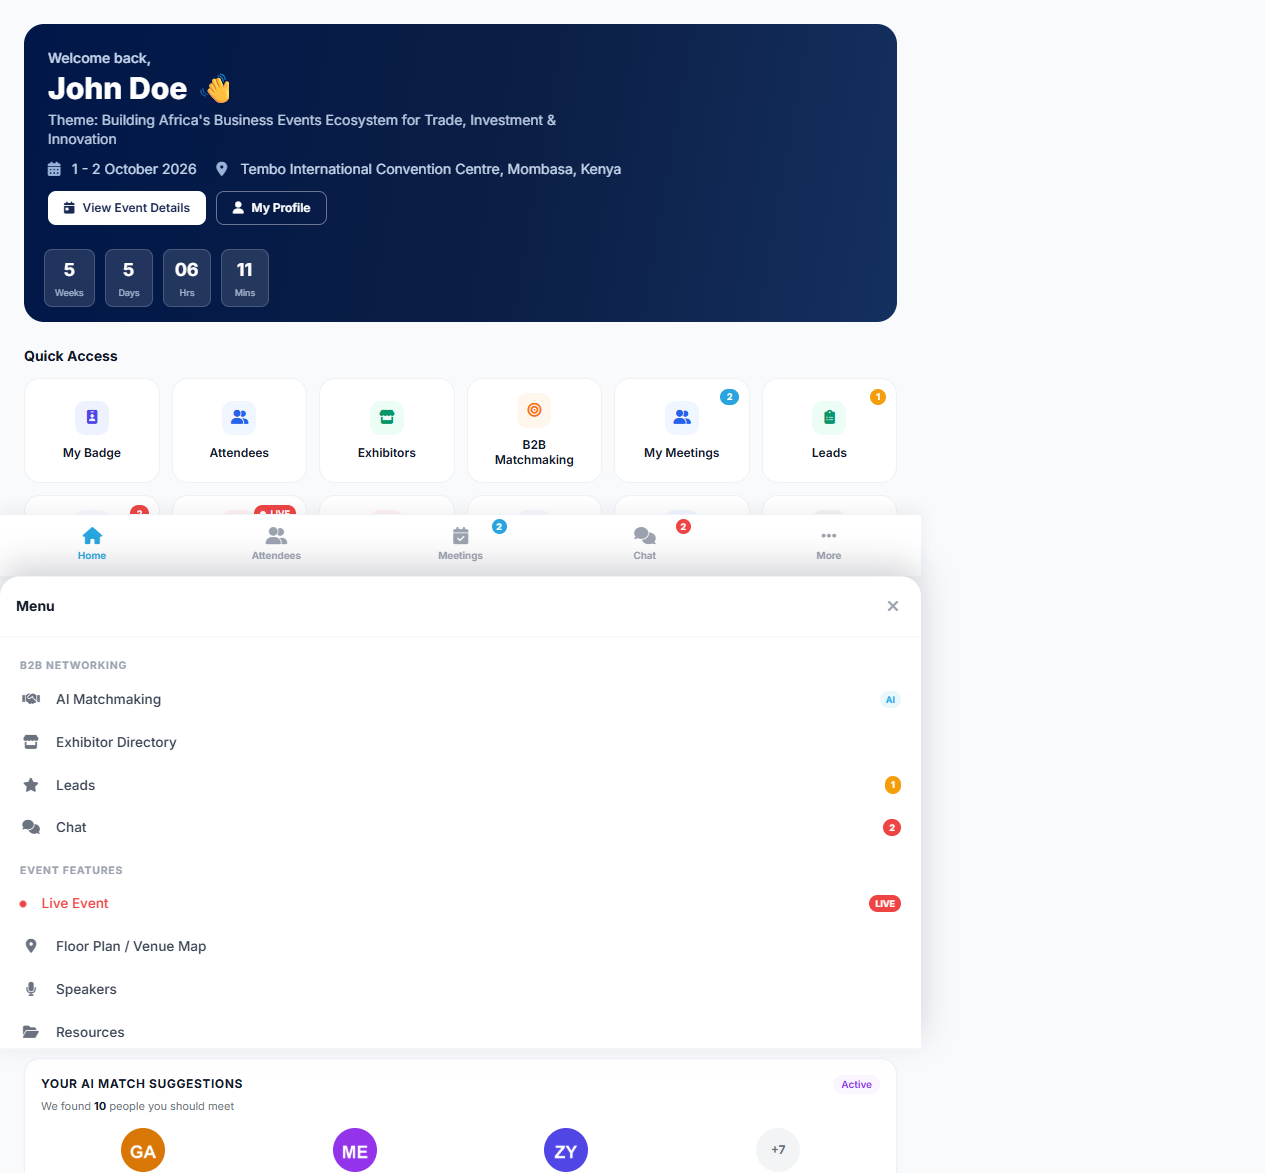
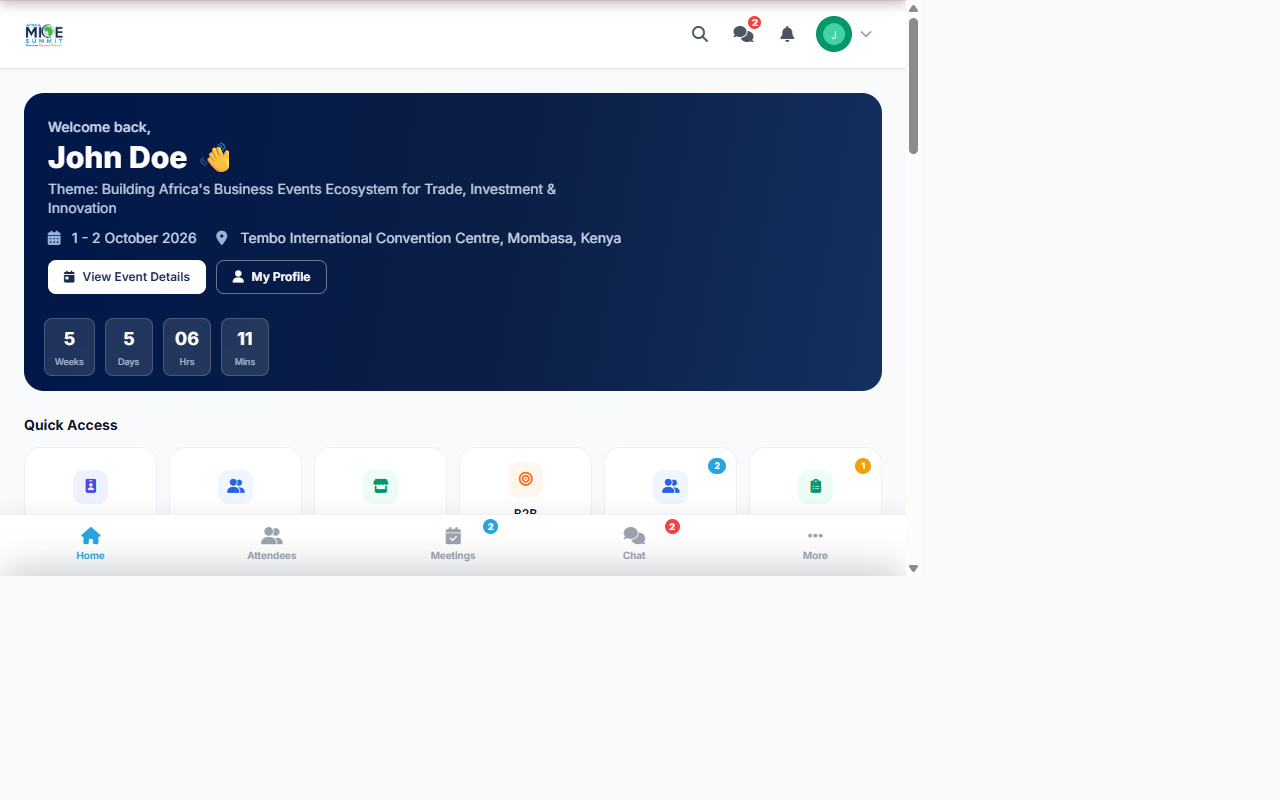
Your Dashboard is mission control. It shows your key numbers (meetings, leads, messages) and a grid of Quick Access tiles that open every module in one tap.
How to
- After login, you're on Home. Review your meeting and lead counts at the top.
- Tap any Quick Access tile — My Badge, Attendees, Exhibitors, Matchmaking, Meetings, Leads, Messages, and more.
- Tap More (the last tile) to reveal hidden shortcuts: Venue Directions, Resources, My Profile, and My B2B Profile.
Navigation Bar & the More Menu
The top navigation bar gives you one-tap access to the core areas — Home, Attendees, Exhibitors, Matchmaking, Meetings, Program, and Live. The More menu opens every remaining feature, neatly grouped.
How to
- Use the top navigation bar to jump between the core areas at any time.
- Tap More to open the dropdown — it groups B2B Networking, Event Features, Account, and Support.
- Choose any item (Leads, Floor Plan, Speakers, Resources, My Profile, Settings, Help Center).
- On a phone, the same menu lives in the More tab of the bottom navigation bar.
Your Account
Your registration, your badge, and the profile that powers your matches.
My Registration & Receipt
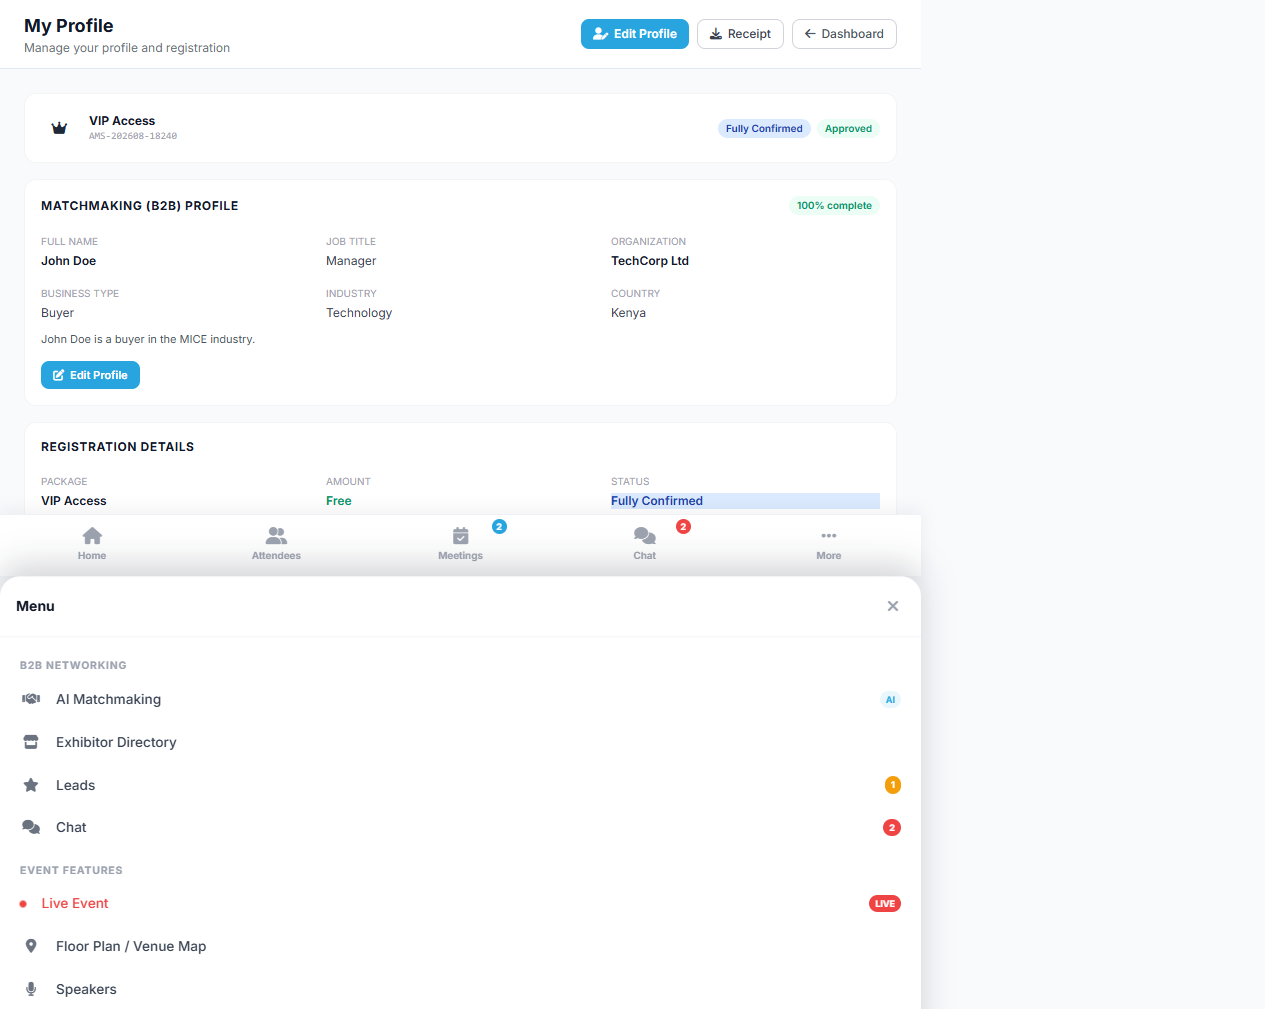
One place for everything about your booking: status, payment, receipt, and calendar. No emails, no chasing.
How to
- Open More → My Profile (or the My Profile tile in Quick Access).
- Review your booking status (Pending / Approved) and payment status.
- Tap Download Receipt to save your payment receipt.
- Tap Add to Calendar to save the summit dates to your phone.
- If anything changed, tap Update Registration to edit your details.
Digital Badge & QR Code
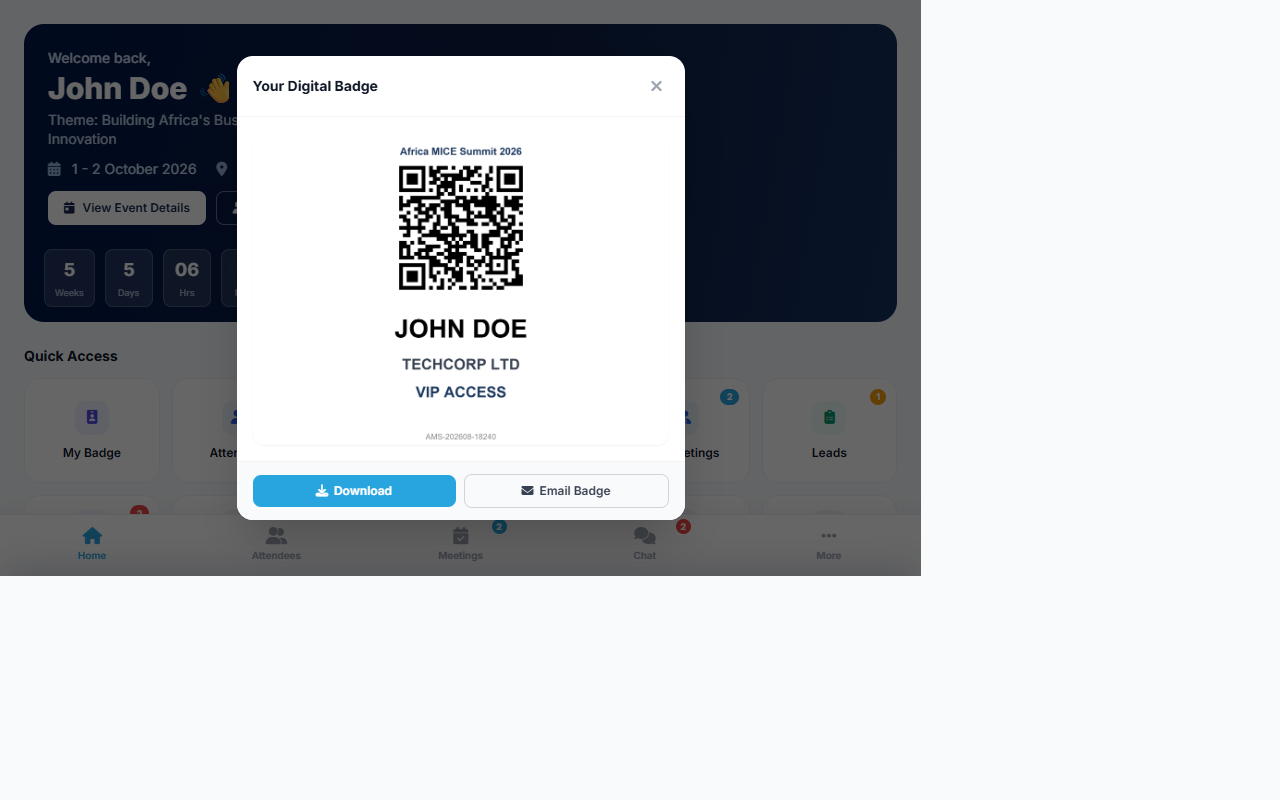
Your badge is your entry ticket. It carries your name, organisation, and a scannable QR code used for check-in and booth lead capture.
How to
- Tap My Badge on the Dashboard (available once your booking is approved).
- Your badge opens in a pop-up — keep it ready to scan at every entry point.
- Tap Download Badge to save the image to your phone for offline entry.
- Show the QR code to any exhibitor scanner — they capture it to log your interest.
Your B2B Profile
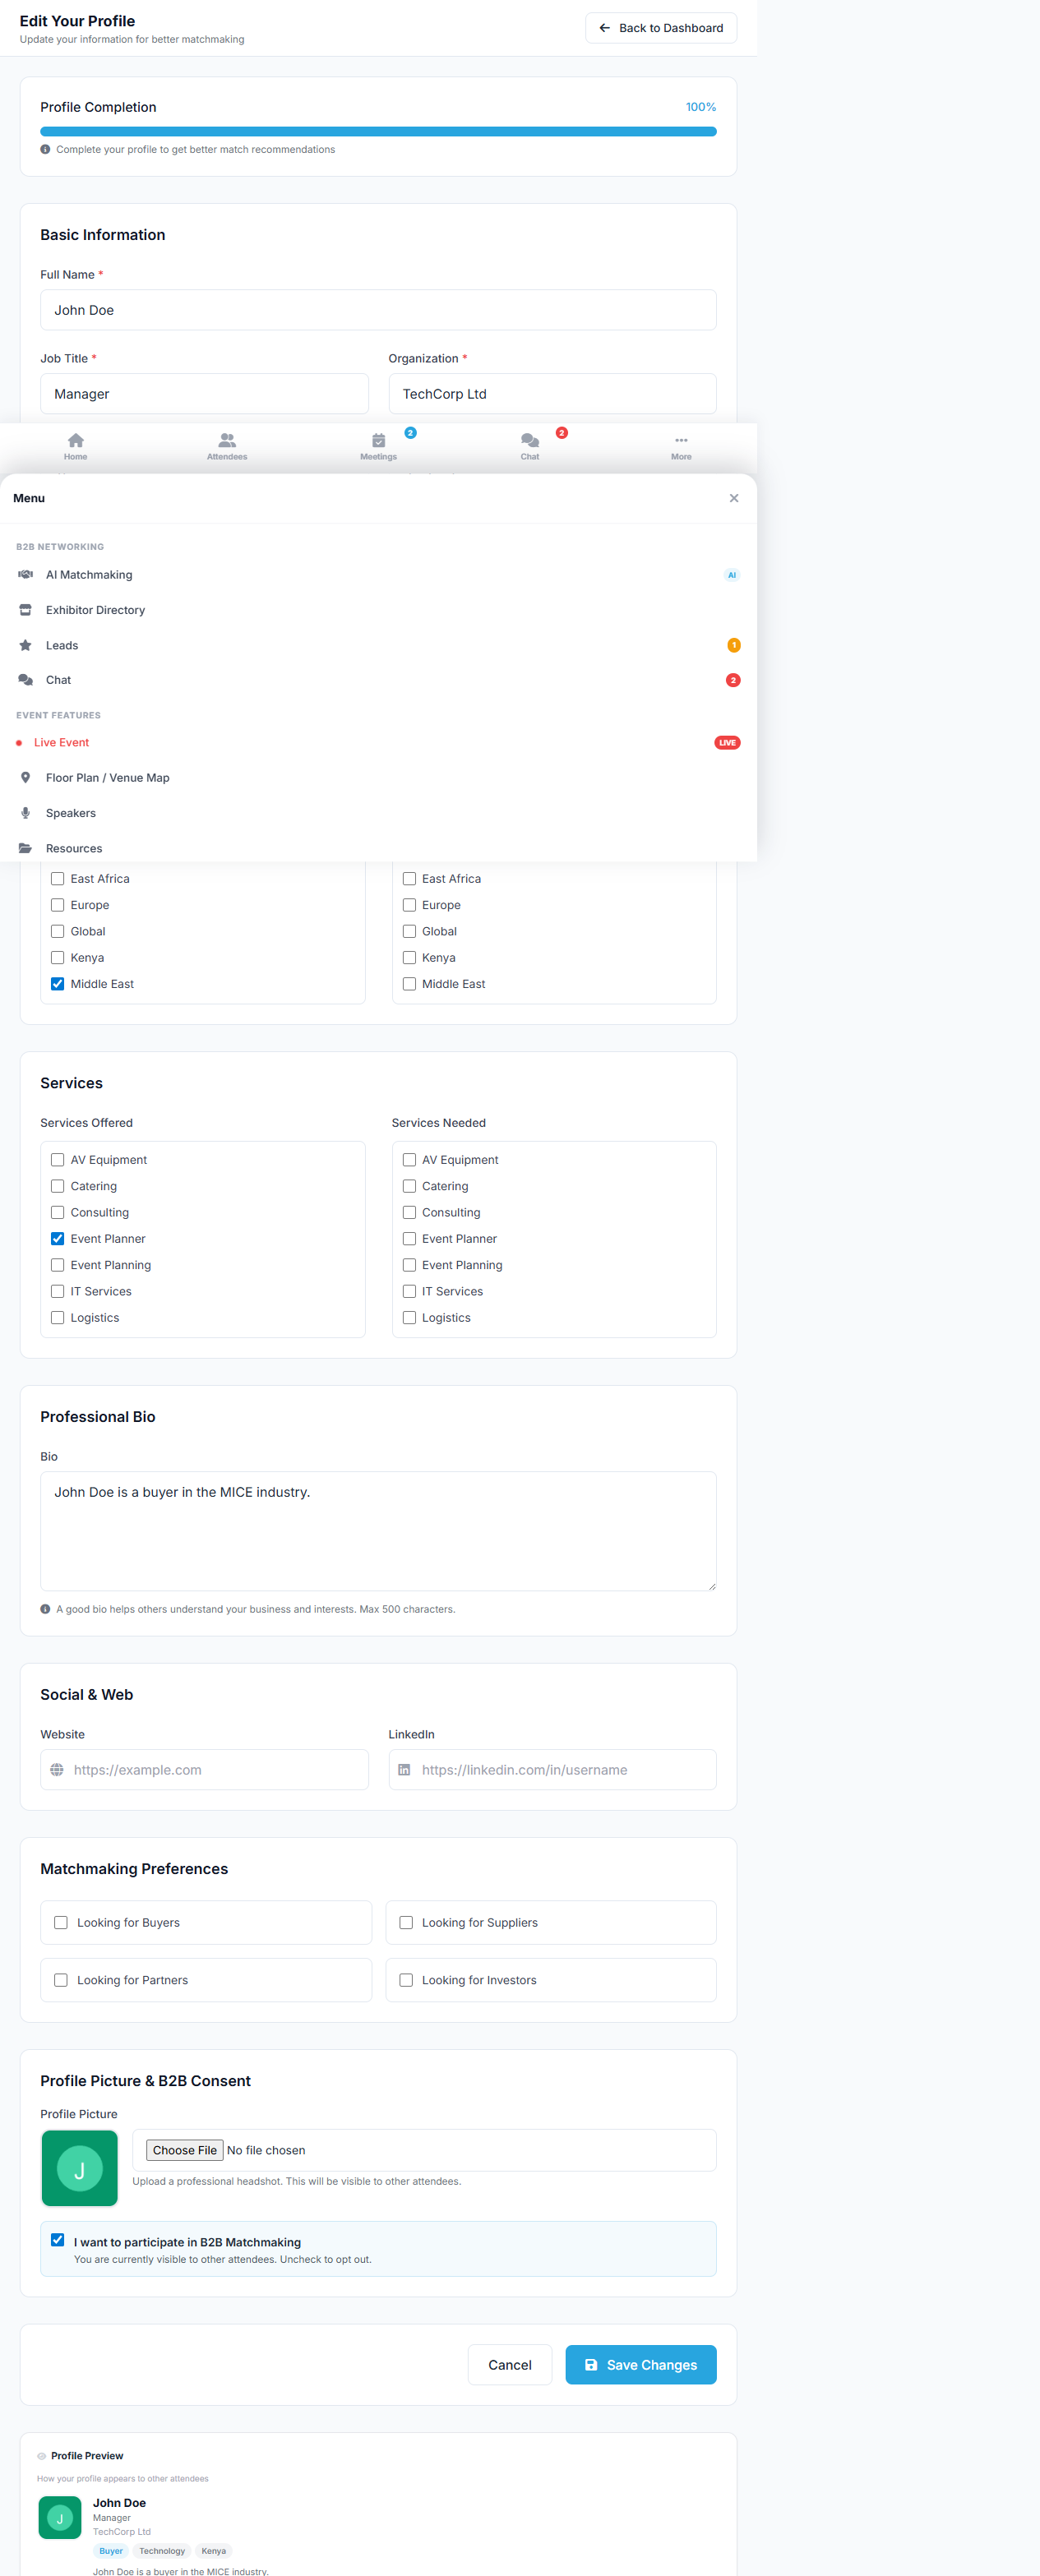
The B2B profile is what IGNITE AI uses to match you with the right people. A complete profile means better, more relevant matches and meeting requests.
How to
- Open More → Settings (or the My B2B Profile tile).
- Fill in your company, job title, sector, and goals.
- Add interests and describe what you're looking for.
- Upload a clear profile photo — profiles with photos get more meeting requests.
- Tap Save. Your changes feed straight into AI matchmaking.
Networking
Find the right people, connect, book meetings, chat, and capture leads — for both attendees and exhibitors.
AI Matchmaking
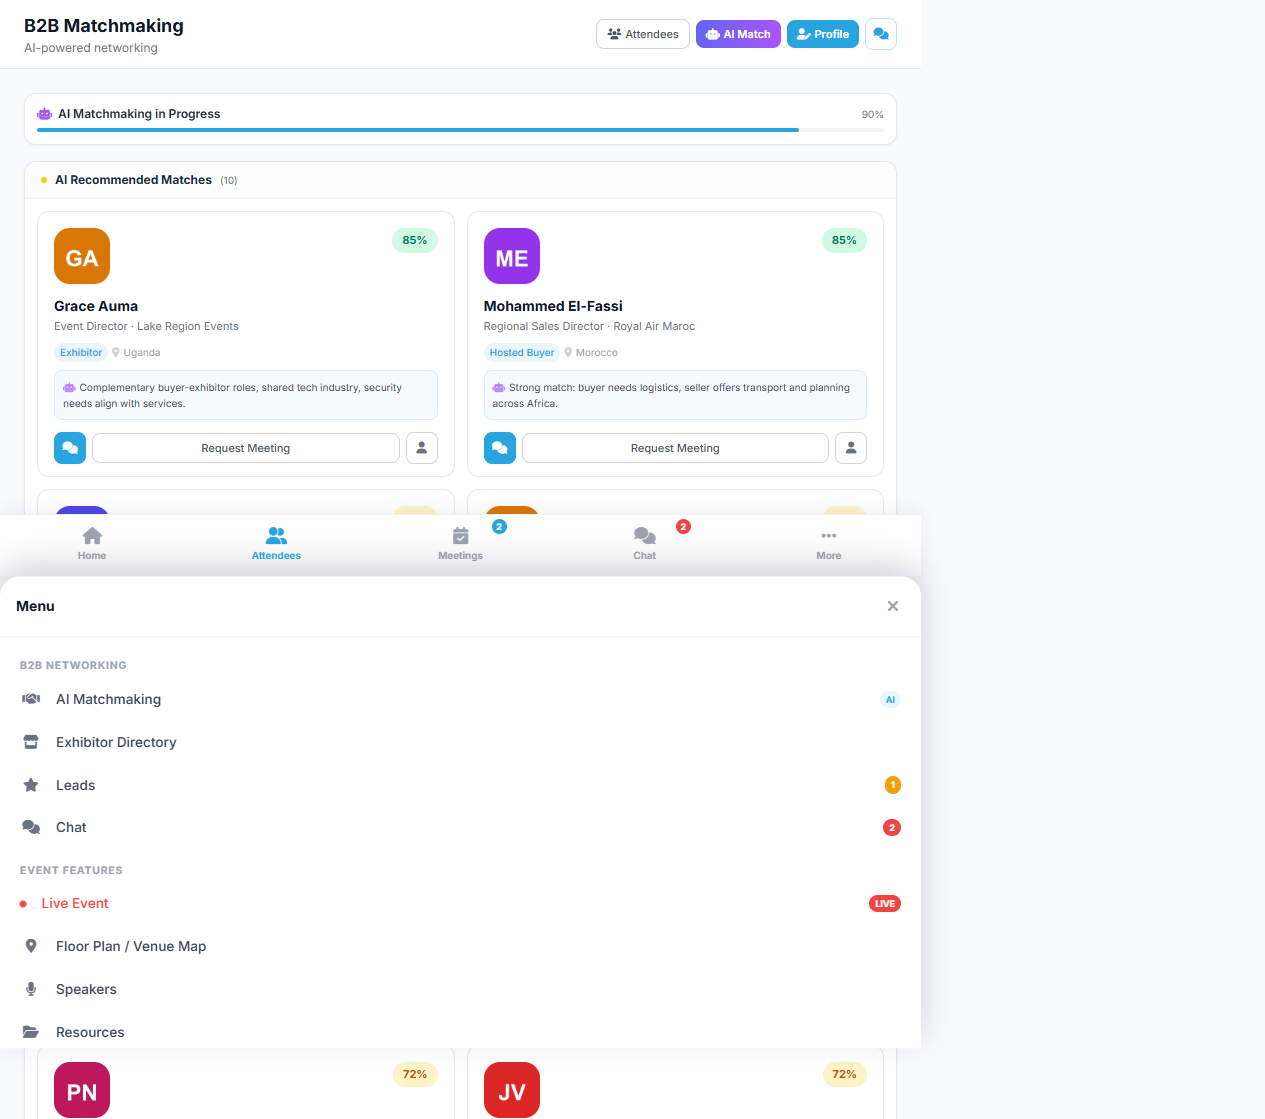
IGNITE AI scans every registered participant and recommends the people most likely to be valuable to you — with a match score and the reason why.
How to
- Tap B2B Matchmaking on the Dashboard (or the navigation bar).
- Browse your recommended matches, each with a % match score.
- Tap a person to open their full profile and see why they were recommended.
- From the profile, tap Connect or Request Meeting to take action.
- If matching hasn't run yet, tap Trigger AI Matching to generate your list.
Attendee Directory & Profiles
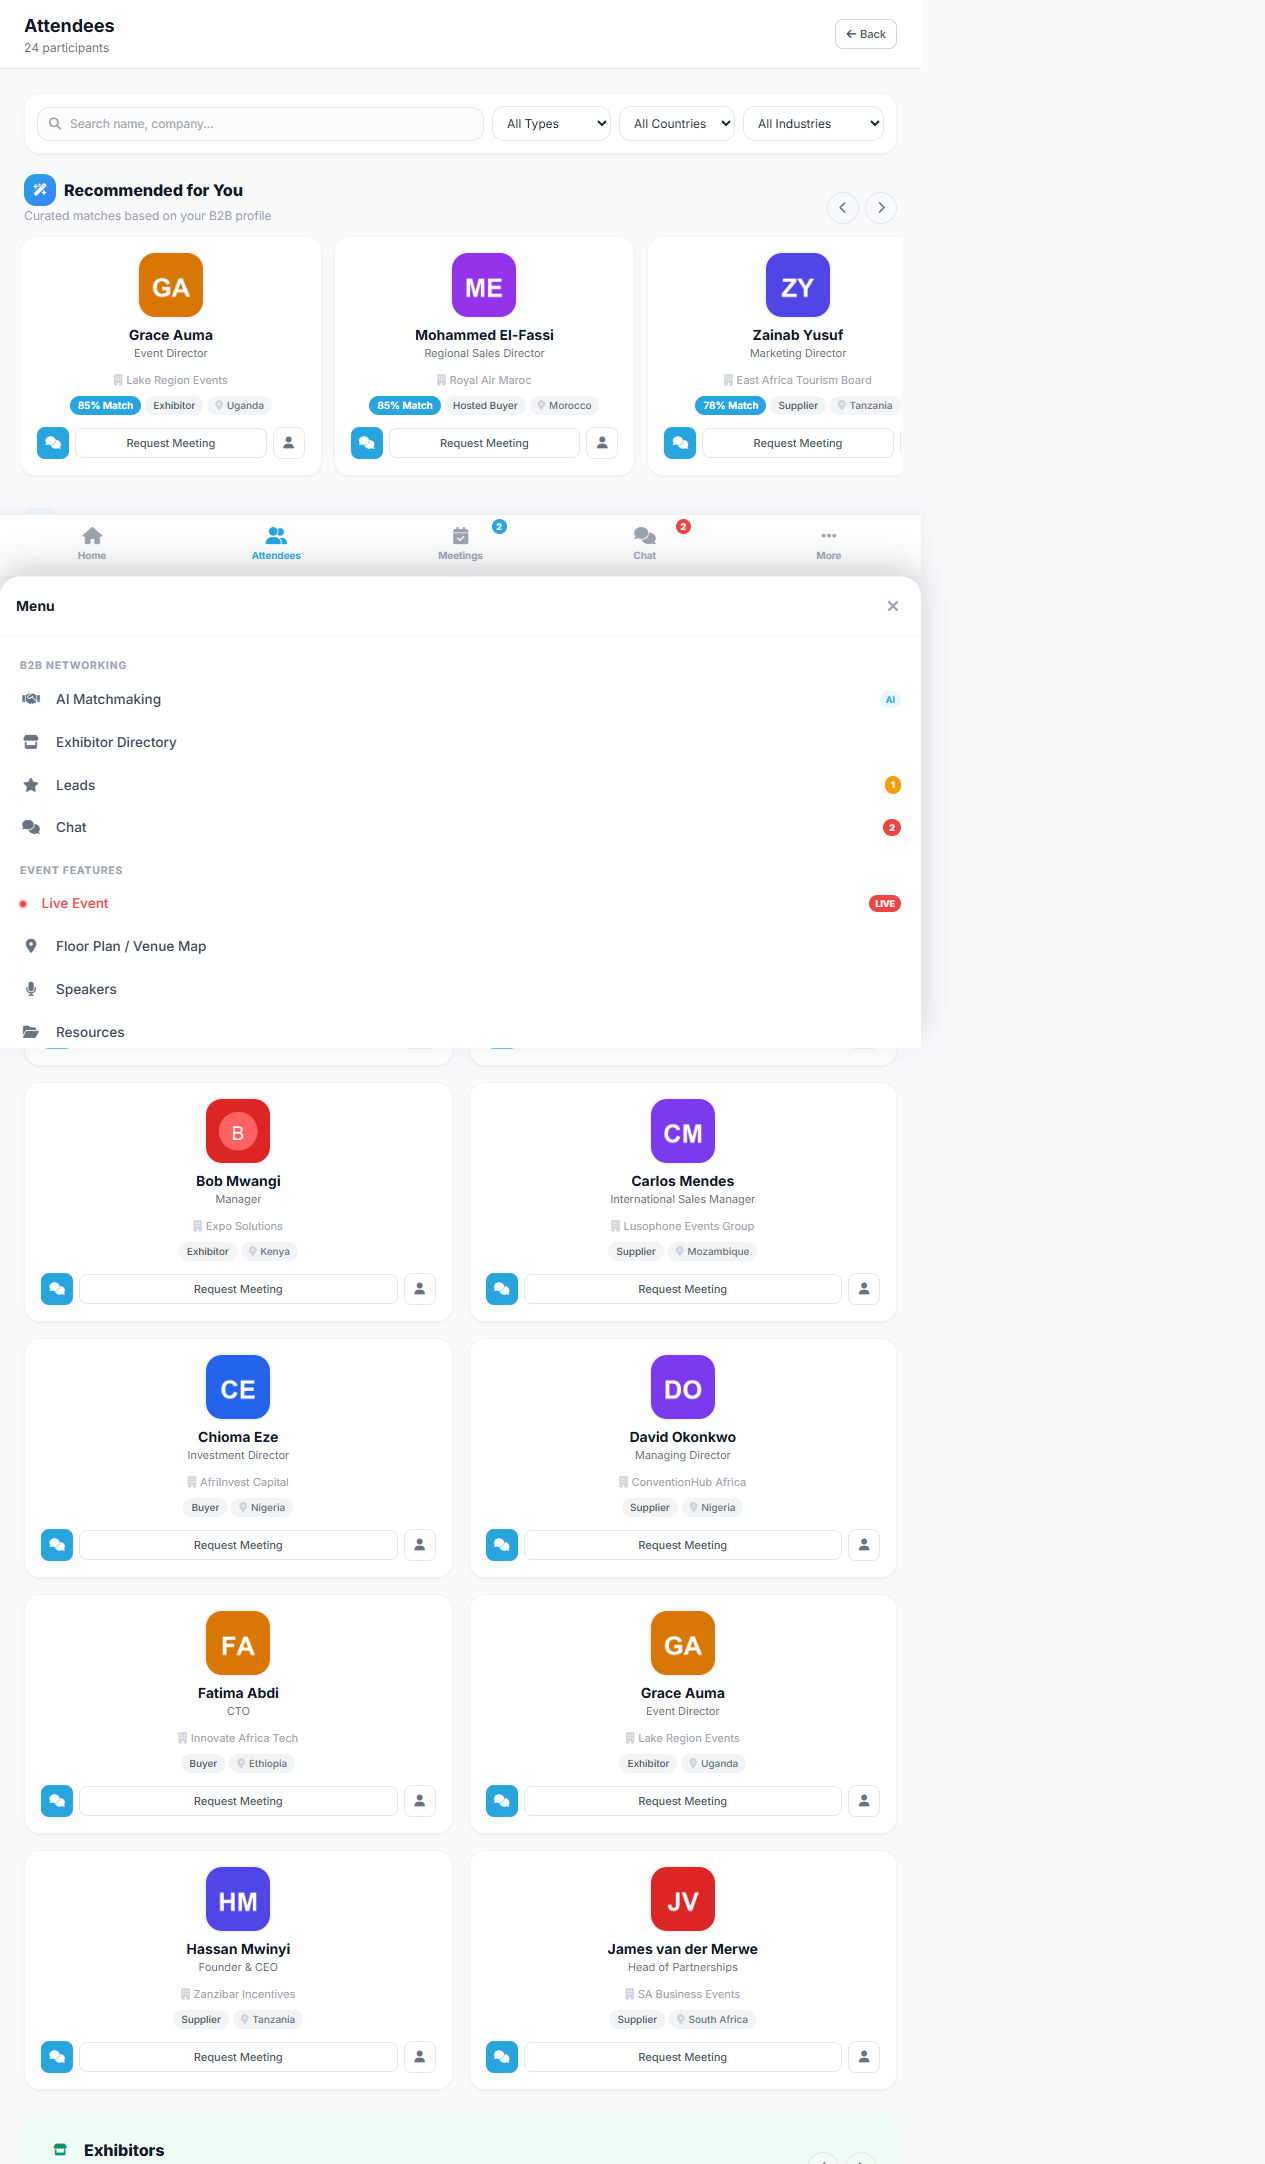
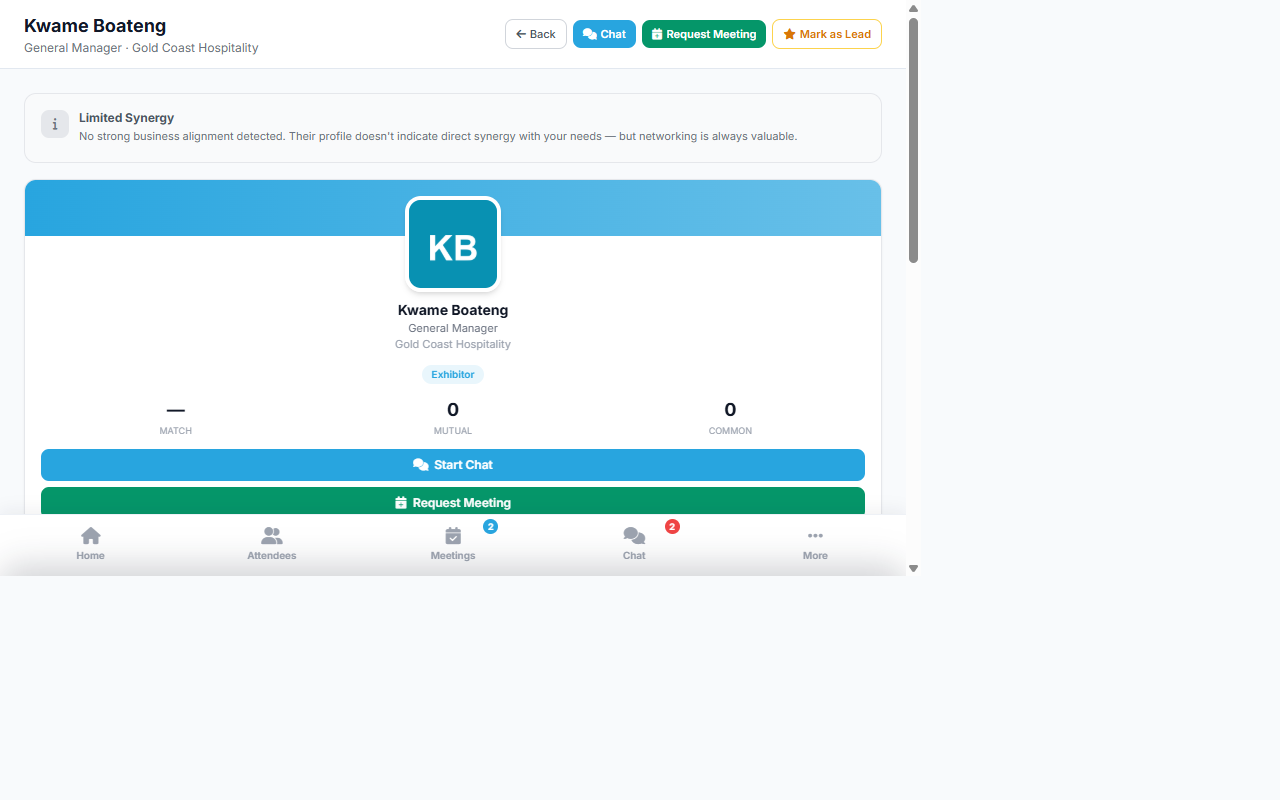
Browse everyone who is attending, search by name or organisation, and open full profiles to take action — connect, meet, chat, save, or mark as a lead.
How to
- Tap Attendees in the navigation (or the Attendees tile).
- Use the search bar or filters to find specific people.
- Tap a person to open their profile.
- From the profile, choose: Connect, Request Meeting, Chat, Save (favourite), or Mark as Lead.
Connections
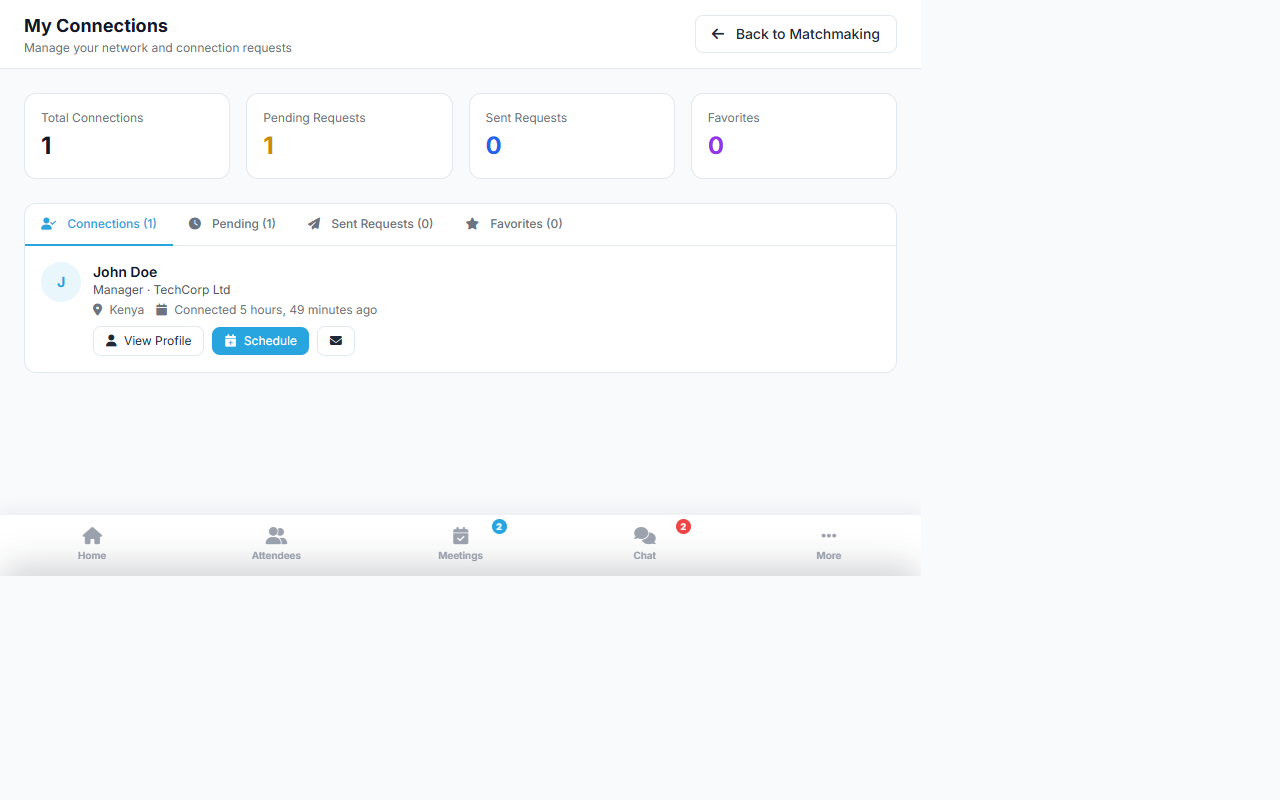
When someone asks to connect with you, approve or decline it here. Your accepted connections form your network for chat and meetings.
How to
- Open More → AI Matchmaking → Connections (or respond from the notification).
- Review incoming requests under the pending tab.
- Tap Accept to connect, or Decline to dismiss.
- Your accepted connections appear in your Connections list.
Meetings
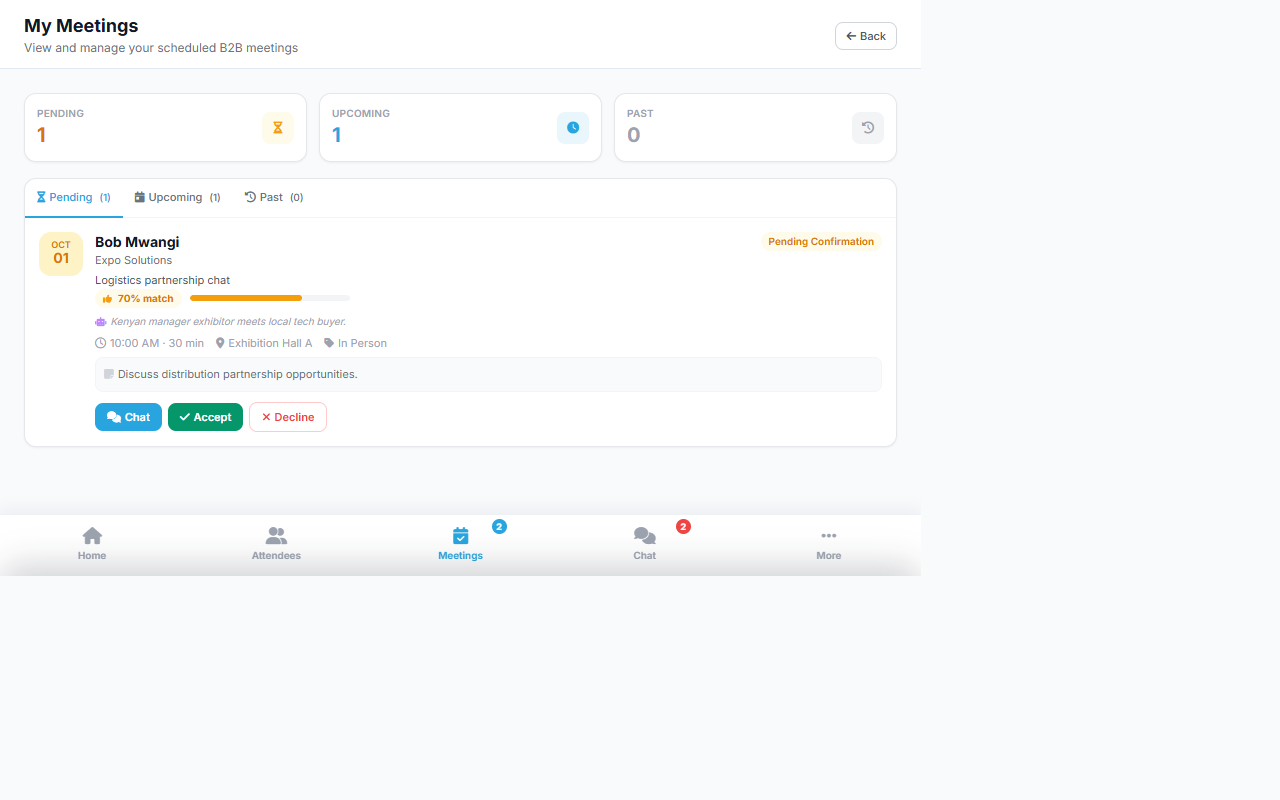
Book 1:1 meetings, accept incoming requests, reschedule, and cancel — all in one calendar. Meetings are organised into Pending, Upcoming, and Past tabs.
How to
- Tap Meetings in the navigation.
- To request a meeting, open a profile and tap Request Meeting, then pick an available time slot.
- For a pending request, tap Accept or Decline.
- For an existing meeting, use Reschedule or Cancel.
- Tap Chat on any meeting card to message the other person directly.
Chat & Messages
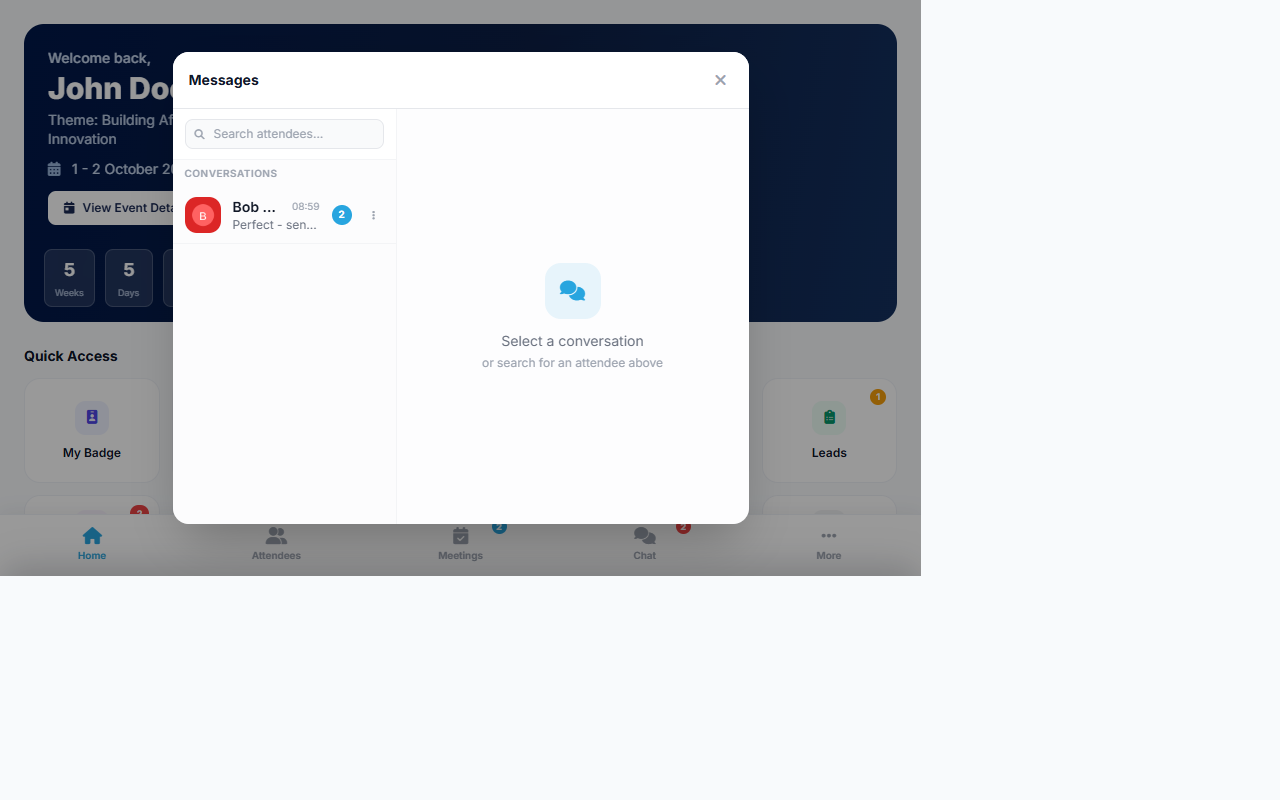
Real-time messaging with any connection — no phone numbers or external apps needed. A red badge shows unread messages.
How to
- Tap Chat in the navigation to see your conversations.
- Open a conversation to read and reply in real time.
- Start a new chat from any profile by tapping Chat.
- Pin important conversations so they stay at the top.
- The red badge on the Chat icon shows your total unread messages.
Leads & Favourites
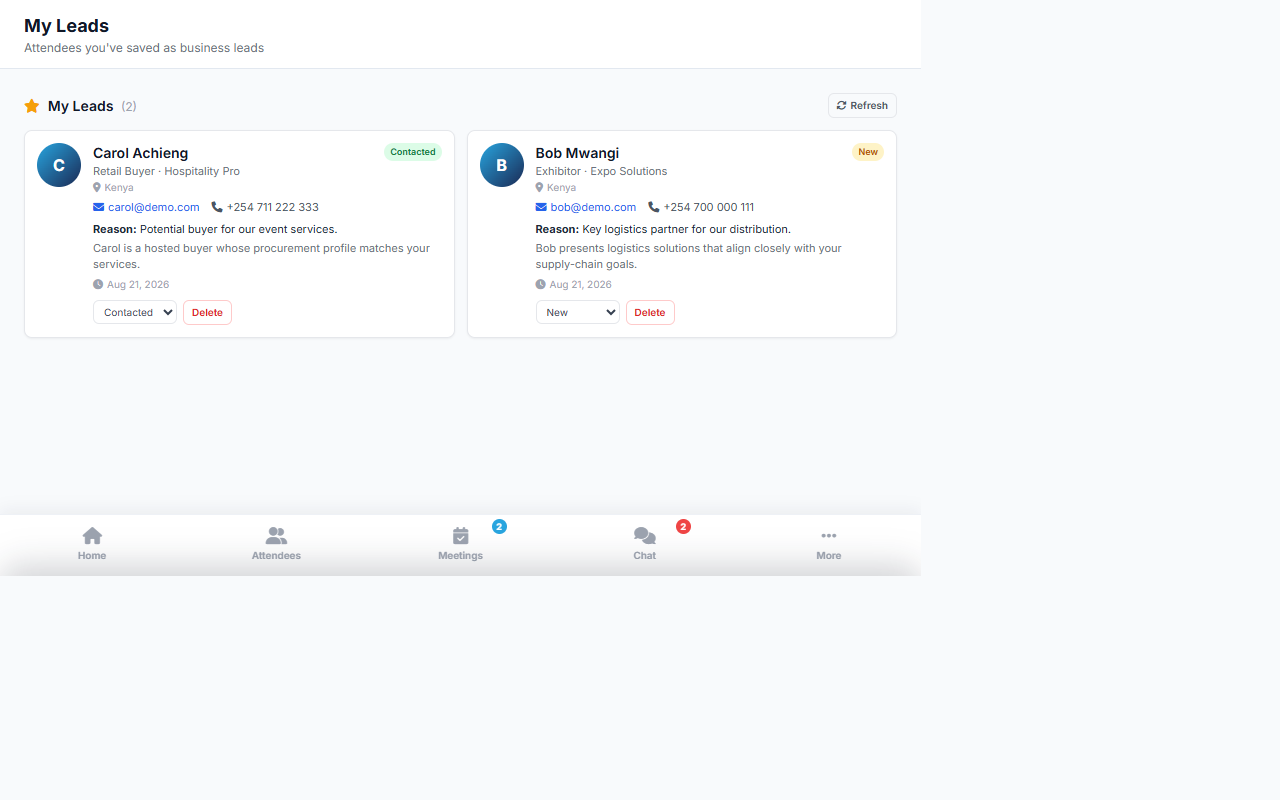
Save the people and exhibitors you want to follow up with. Every lead card includes their contact details, your reason for saving them, and an AI insight to guide your outreach.
How to
- On any profile, tap Mark as Lead (or the star) and add a short note.
- Open Leads from the Dashboard or More menu to see everyone you've saved.
- Move each lead through New → Contacted → Qualified → Converted.
- Tap the email or phone icons to reach out, or View Profile to reopen the full profile.
- Delete a lead when it's no longer relevant.
For Exhibitors
How attendees discover you — and how you present, engage, and capture leads.
Exhibitor Directory
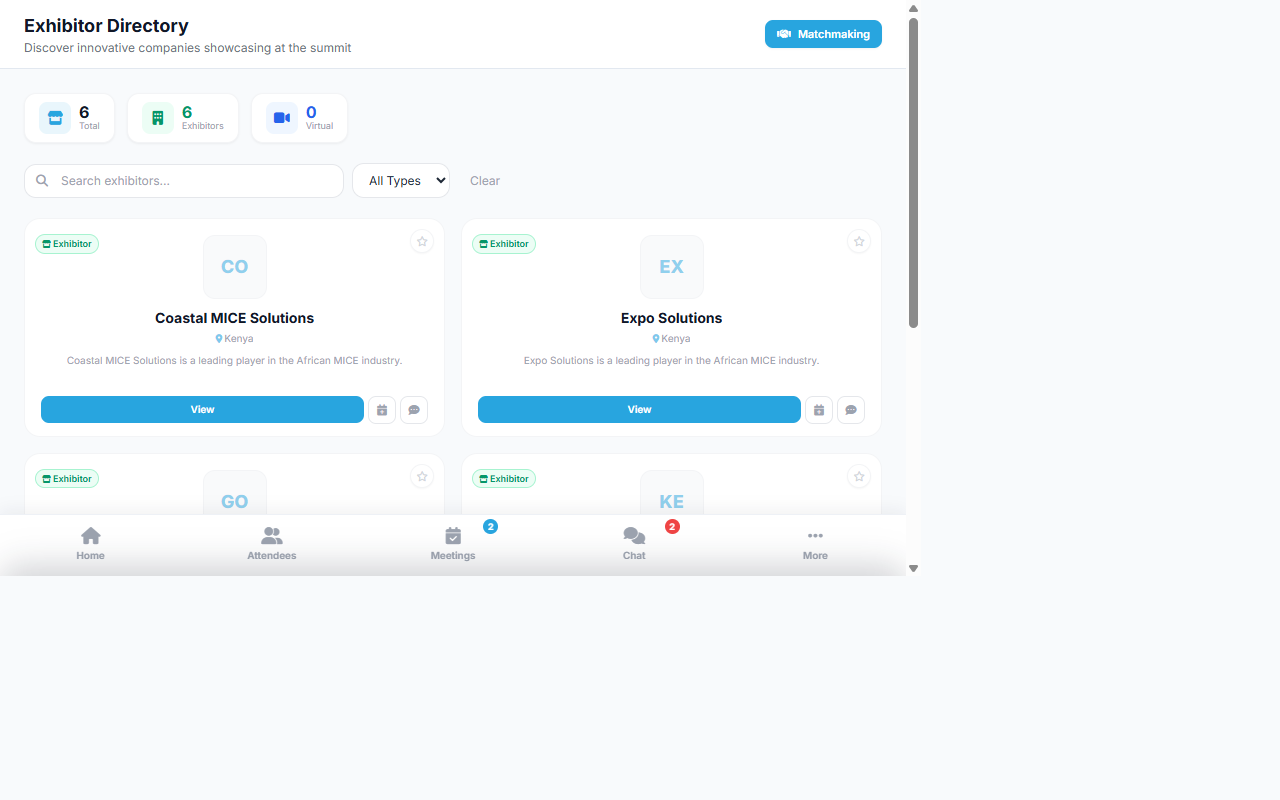
The directory is how every attendee finds your company. As an attendee you browse and favourite stands; as an exhibitor, your profile here is your shop window.
How to
- Tap Exhibitors on the Dashboard (or the navigation bar).
- Search by company name or browse the full list.
- Tap a company to view its booth, products, and team.
- Tap the star to favourite stands you want to revisit.
- Exhibitors: keep your Digital Booth & Company Profile complete so attendees find you and contact you.
Your Virtual Booth
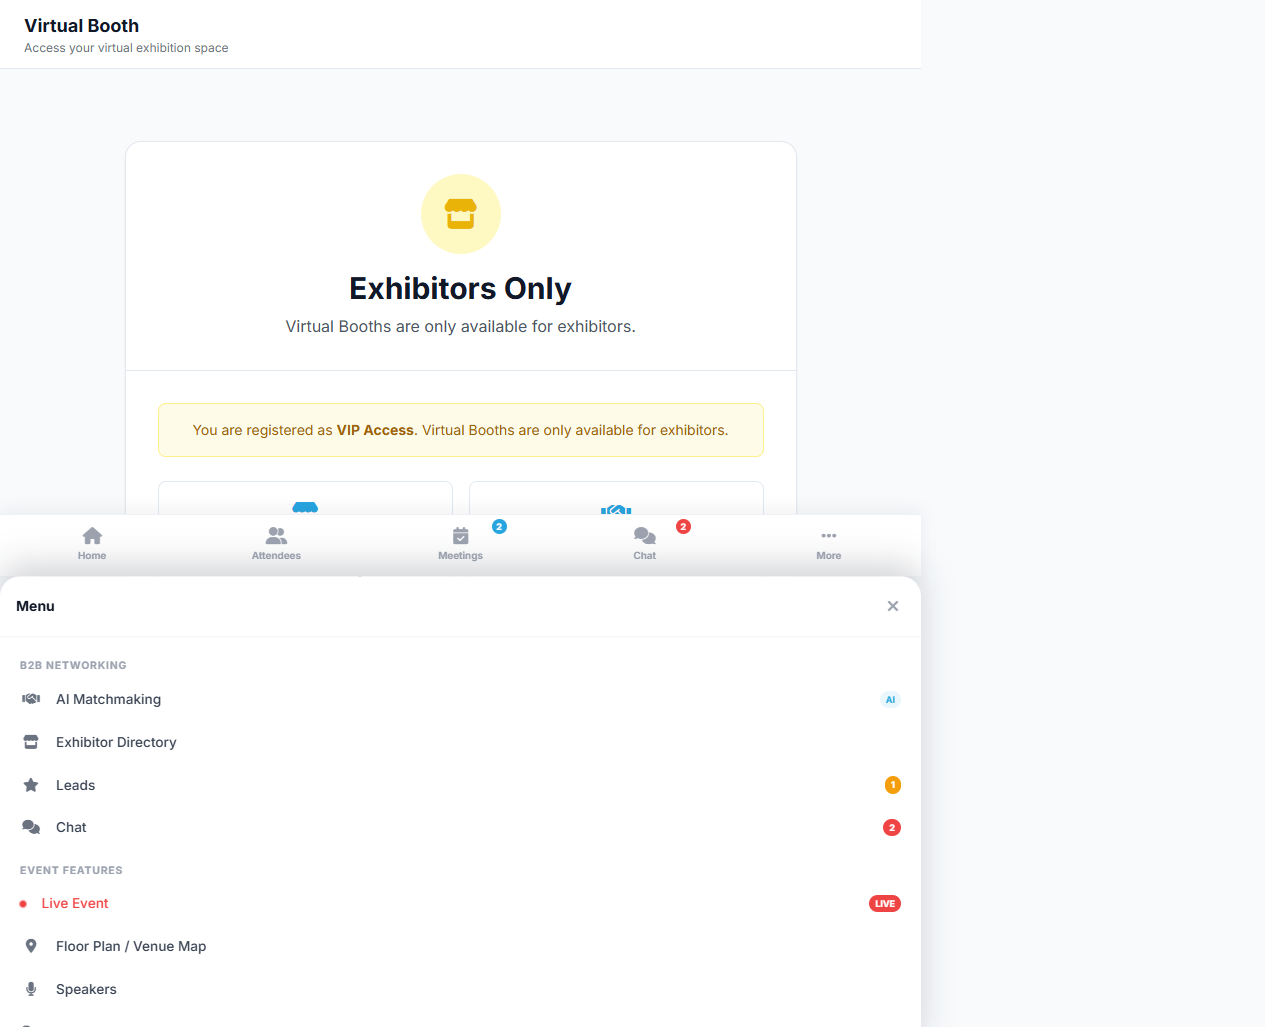
Your Virtual Booth is available whenever your booking or package includes an active virtual booth. Inside you'll find your engagement hub — video chat, live chat, brochures, lead capture, and analytics.
How to
- Open More → My Virtual Booth to access your booth dashboard.
- Use Booth Setup to add your intro video, brochures, and contact details.
- Attendees can start a video chat or live chat with your team.
- Review Leads to see everyone who engaged with your booth.
- Check Analytics for views and engagement.
Event Day
Everything you need on the ground — program, speakers, the floor plan, and the live broadcast.
Program & Agenda
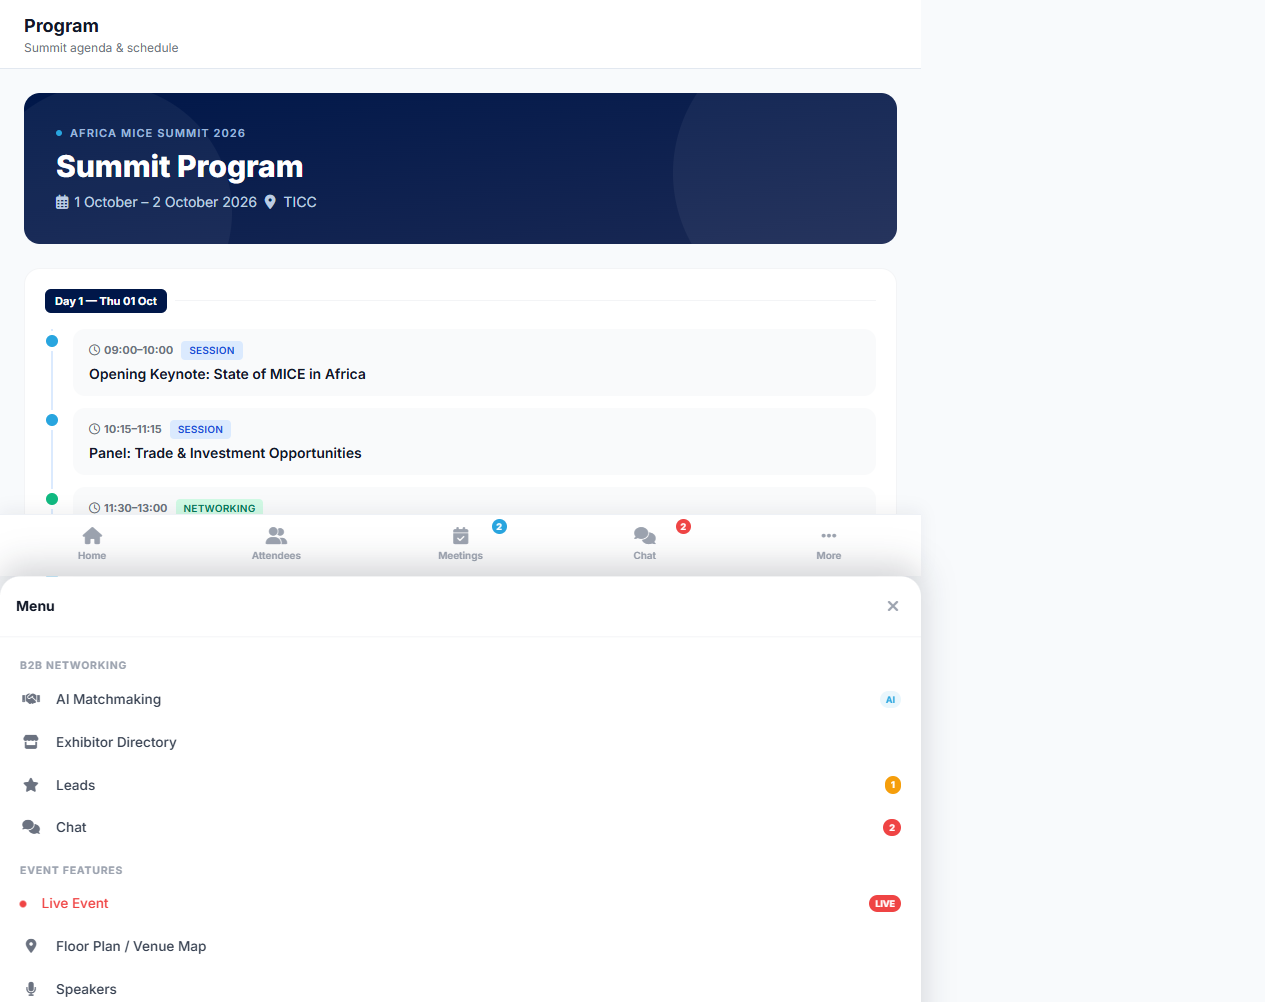
The full summit agenda, organised by day with session times and types, so you never miss the moments that matter.
How to
- Tap Program on the Dashboard (or the navigation bar).
- Scroll the agenda, day by day.
- Look for Session and Networking labels to plan your time.
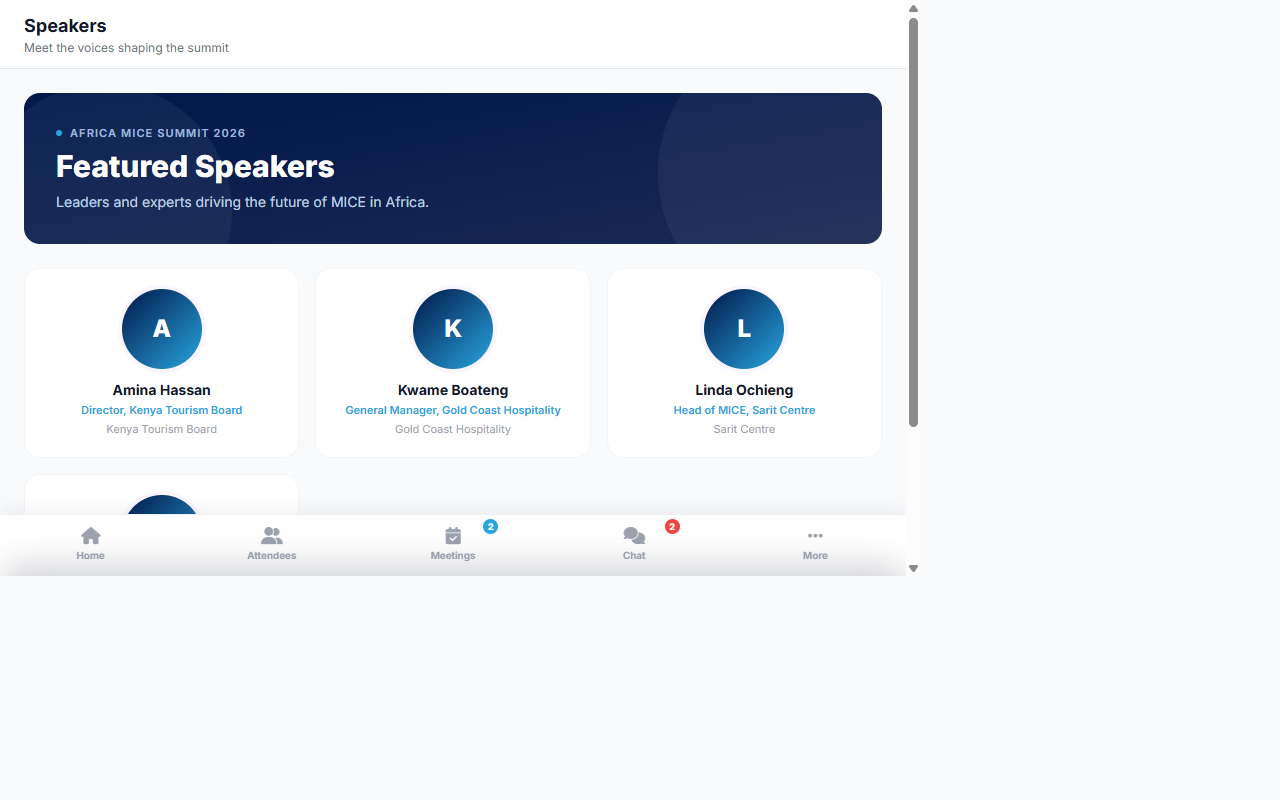
Speakers
Meet the speakers and panellists before you see them on stage — their roles, organisations, and the sessions they lead.
How to
- Tap Speakers on the Dashboard (or More → Speakers).
- Browse the speaker cards.
- Tap a speaker to see their bio and sessions.
Floor Plan & Venue Map
Find your way around the venue and exhibition floor — locate booths, session rooms, and entrances before you arrive.
How to
- Tap Floor Plan on the Dashboard (or More → Floor Plan / Venue Map).
- View the venue map and exhibition layout.
- Tap Open in Google Maps for turn-by-turn directions.
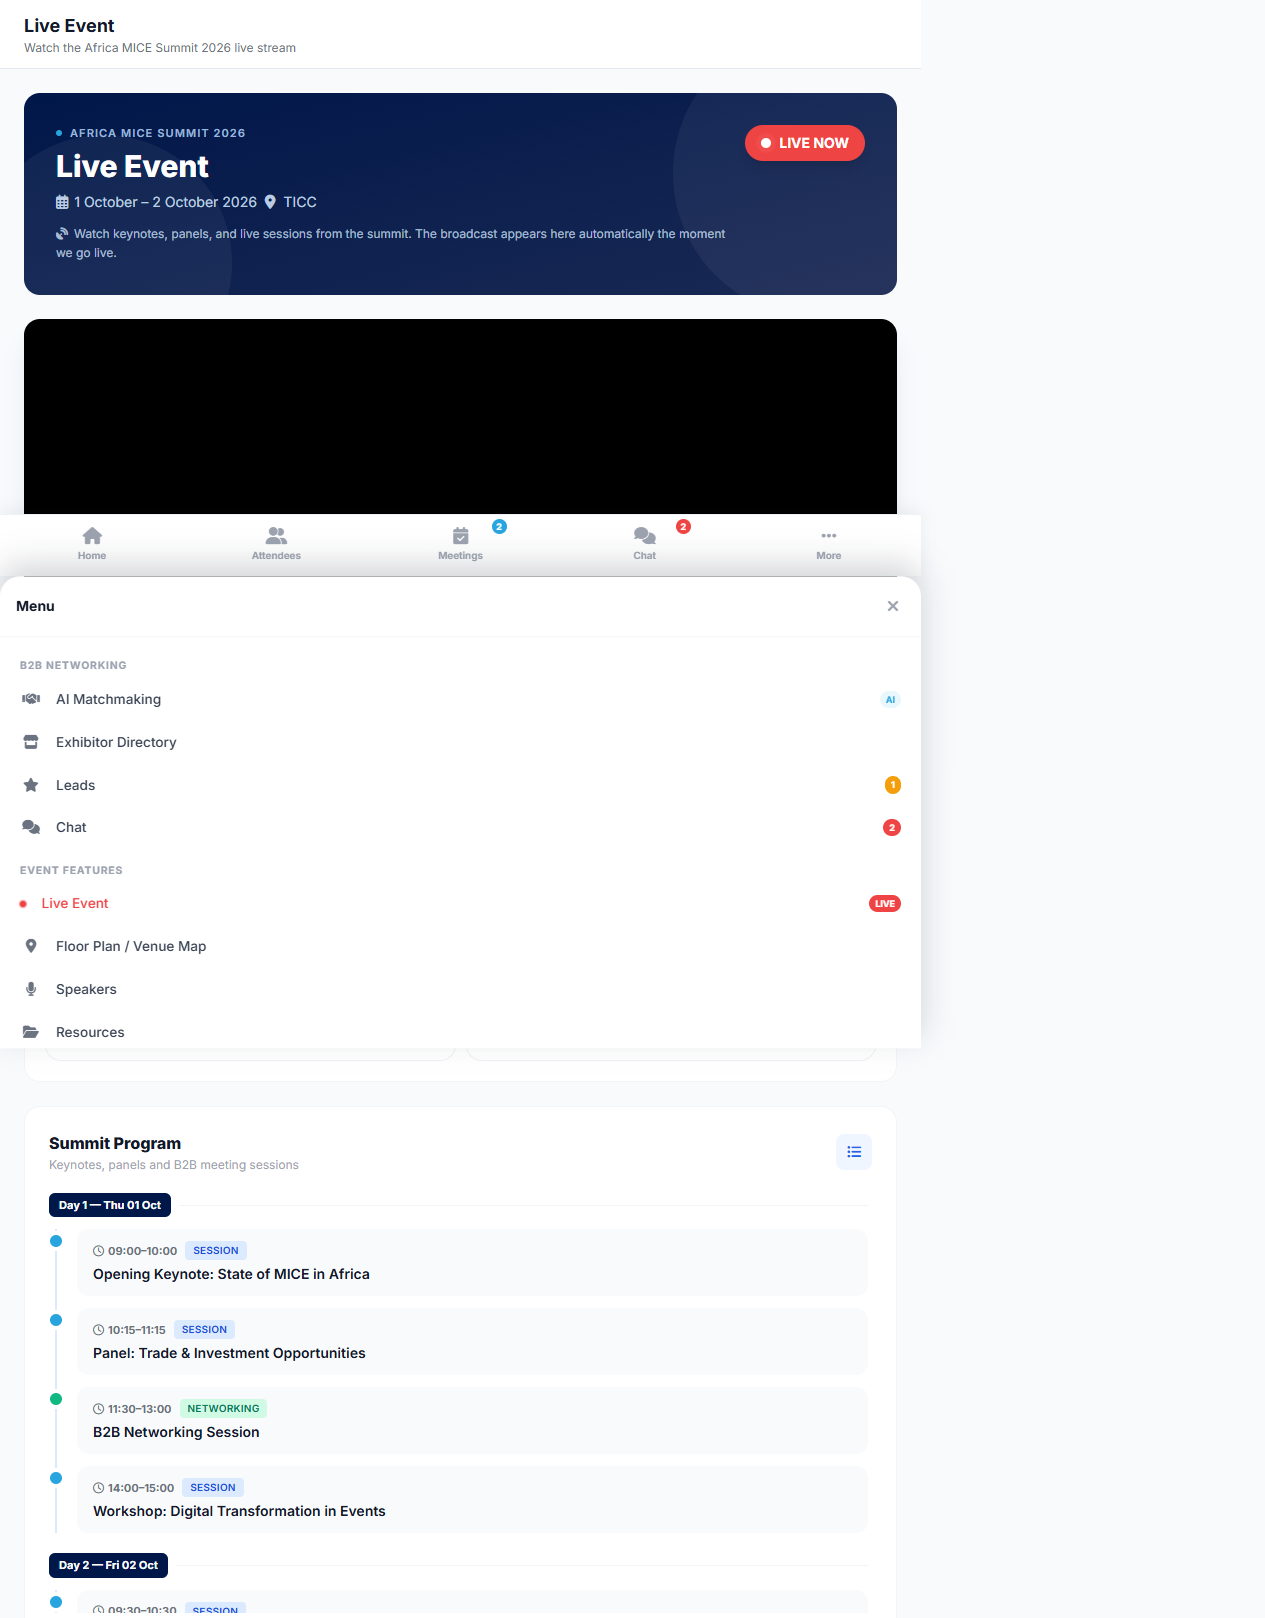
Live Event & Streaming
When the summit goes live, watch the broadcast right from the portal. A red LIVE badge appears the moment streaming starts.
How to
- Tap Live Event on the Dashboard.
- The stream plays automatically, muted. Tap the speaker icon to unmute.
- Tap the video to show or hide the controls — they auto-hide after 4 seconds.
- Use the play/pause button (bottom-left) to pause, and tap the LIVE badge to jump back to the live edge if the stream lags.
- Tap the fullscreen icon to watch in full screen.
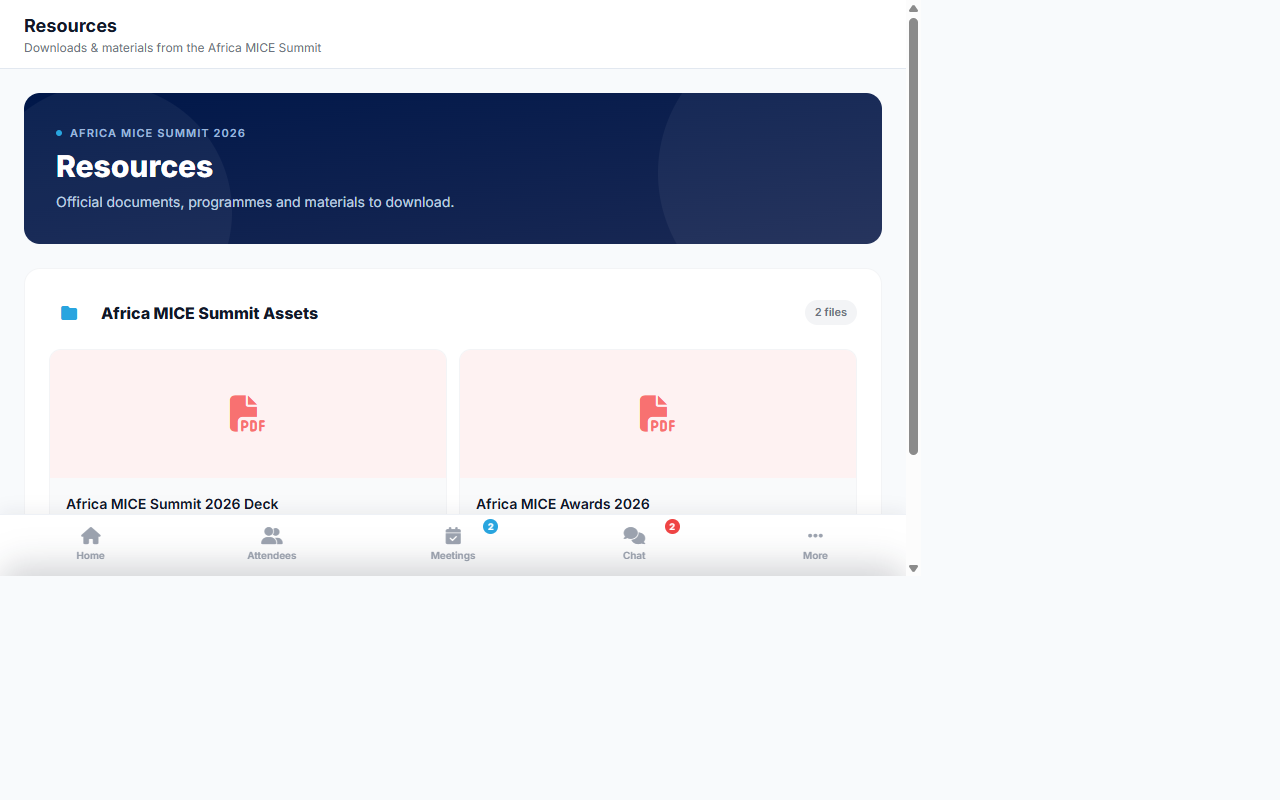
Resources
Official AMS downloads and assets — brochures, guides, and documents, organised and available any time.
How to
- Tap Resources (Dashboard → More → Resources).
- Browse the available files and pages.
- Tap any file to view or download it.
Stay Informed & Get Help
Notifications keep you on top of every update, and the Help Center is there whenever you need it.
Notifications
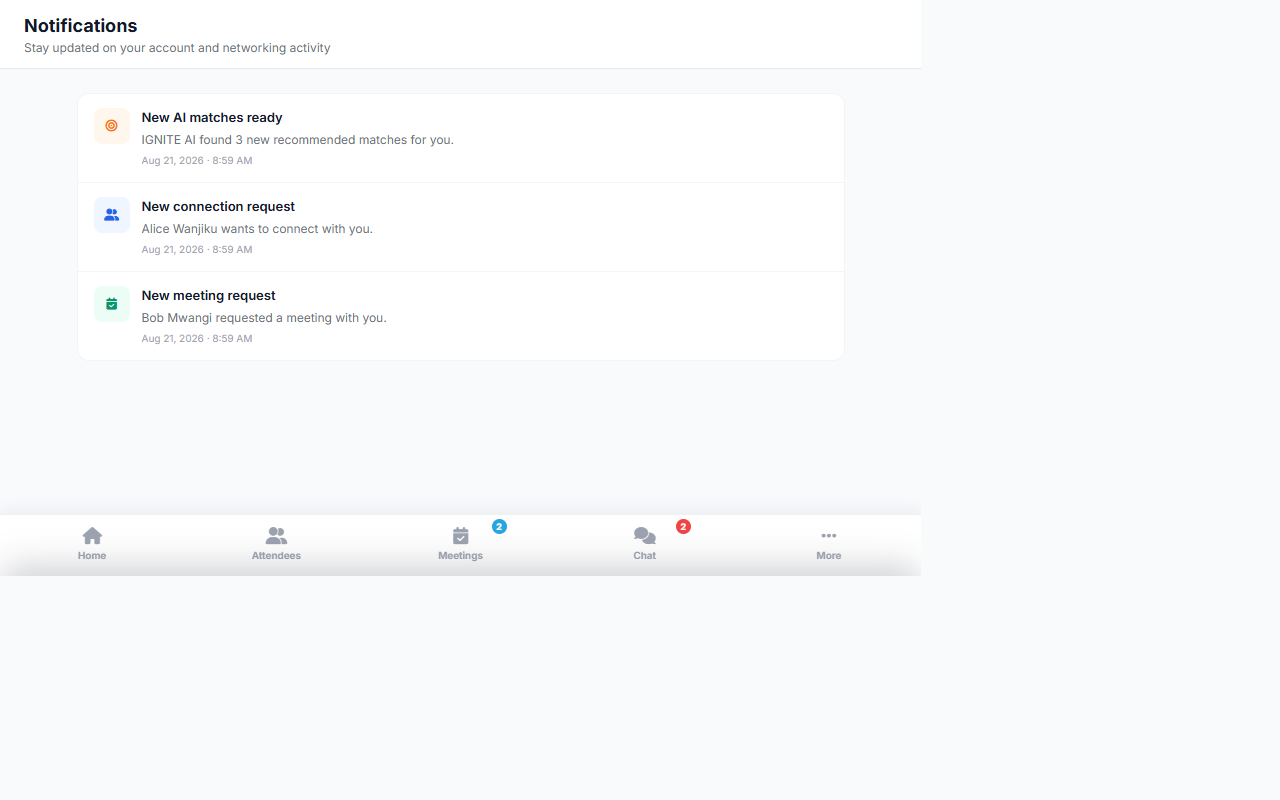
A dedicated feed for every connection request, meeting invite, and portal update — so you never miss a thing.
How to
- Tap the bell icon in the header to open your notifications.
- Review new alerts — connection requests, meeting invites, and updates.
- Tap a notification to jump straight to the relevant screen.
- Mark items as read or archive to keep your feed tidy.
Help Center & Support
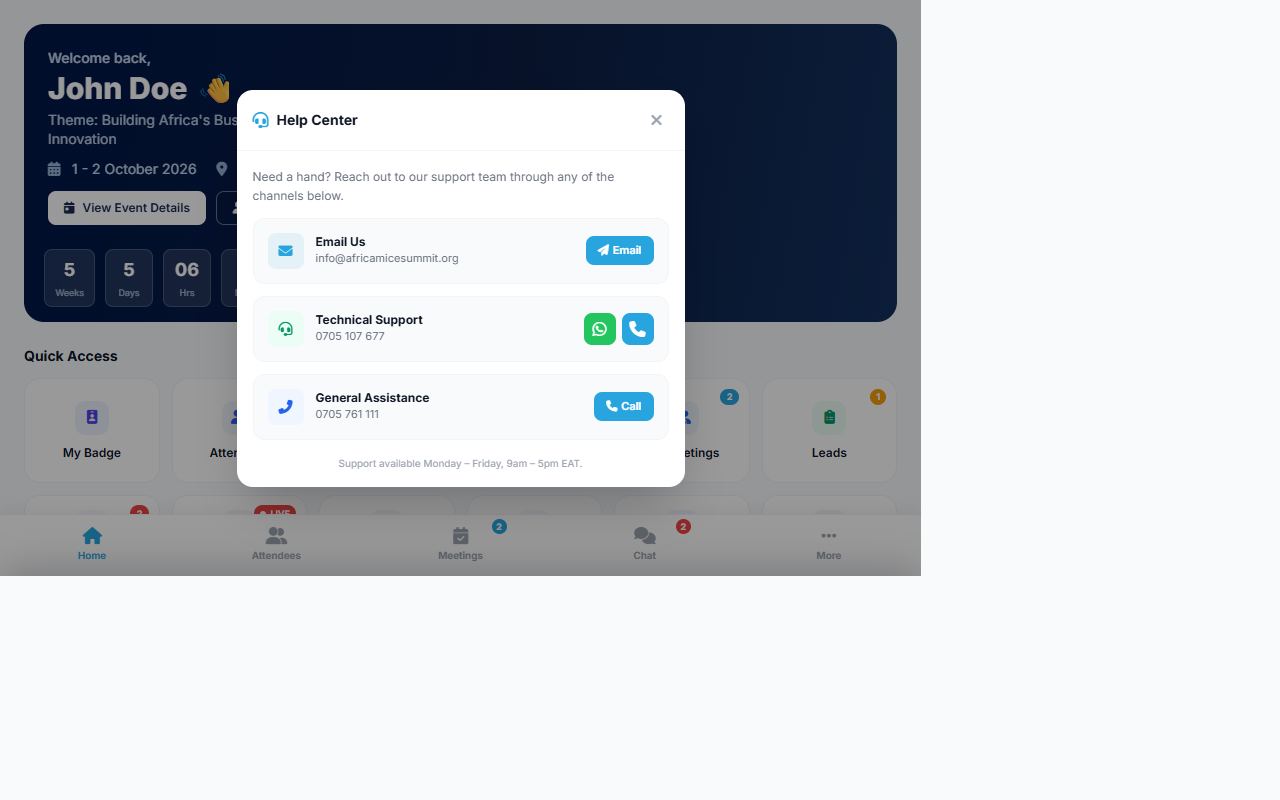
Stuck? The Help Center has answers, and the support team is one tap away.
How to
- Open More → Help Center (or tap Help in your account menu).
- Browse the frequently asked questions.
- Still need help? Email info@africamicesummit.org.
Ready to put it into practice?
Log in to the portal and explore each module for yourself. Your dashboard is waiting.